
25 Reasons Why Live FX is My Favorite Media Server for Virtual Production
It’s no secret that my favorite media server for Virtual Production is Assimilate Live FX, so I wanted to share a few reasons why it has become my go-to tool.
Before diving into specifics, I think it helps to look at the foundations of different systems.
Many of the major media servers in our space were originally built for live events, concerts, broadcast shows, VJs and touring environments. Unreal Engine, of course, was built for video games.
Assimilate’s foundation, on the other hand, comes from high-end color finishing, live compositing, fast transcoding and real-time playback, all of which happen to be extremely important for Virtual Production, especially for car-process work.
That’s why I sometimes refer to Live FX as a Cinematic Media Server, while others fall more into the Live Event Media Server category.
Not better or worse, just different origins, with different strengths.
It’s not my intention to put down any other company or product. Every tool in this space solves complex problems and has use cases where it excels. Live FX included. They are similar tools, but built with different priorities.
For the cinematic problems I tend to solve, Live FX is usually the best fit.
A quick example of what one Live FX system can do
On a single Silverdraft PC, Live FX can:
Drive up to seven 4K HDR LED processors
Play multiple streams of 12K 360° video
Perform live color grading with masks
Do live clone stamping,
Map hundreds of lights directly to content, and
Run Live Grid Warp
All simultaneously, on one machine, under one license.
This architecture means less IT overhead, fewer moving parts, and more computational headroom for cinematic workflows.
You can also key incoming green-screen video in real time, output four separate views for ghost-frame or multi-camera workflows, and combine live action with CG plates — again, from a single machine and license.
Whether you’re new to Live FX or you come from a Disguise, Pixera, or Unreal background, I think you’ll find some useful insights here.
1) One Server can power up to 7x LED Processors! With Live FX, you can run up to 7 LED processors from 1 machine which greatly reduces the cost and complexity of the system. There are many obvious benefits to this, but some that you might not think about at first. We’ve used this exact setup for at least a dozen shoots already successfully. There is also a Multi-Node setup as well, if you need more than 7 outputs.
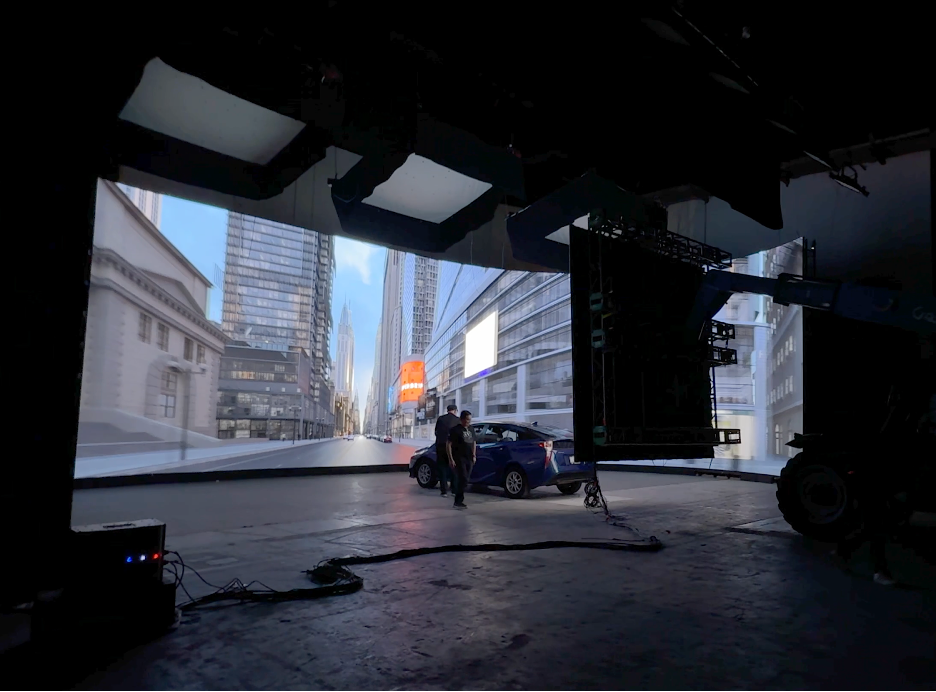
Simplemente in Mexico City, 7x 4k LED Processors from one PC!
2) Most Cost Effective.
Live FX is the most cost effective media server by a long shot. With all the bells and whistles it's still under $700/month per node and hardware agnostic! Especially if you use it across many nodes, the cost of Live FX is a fraction of what other media servers cost.
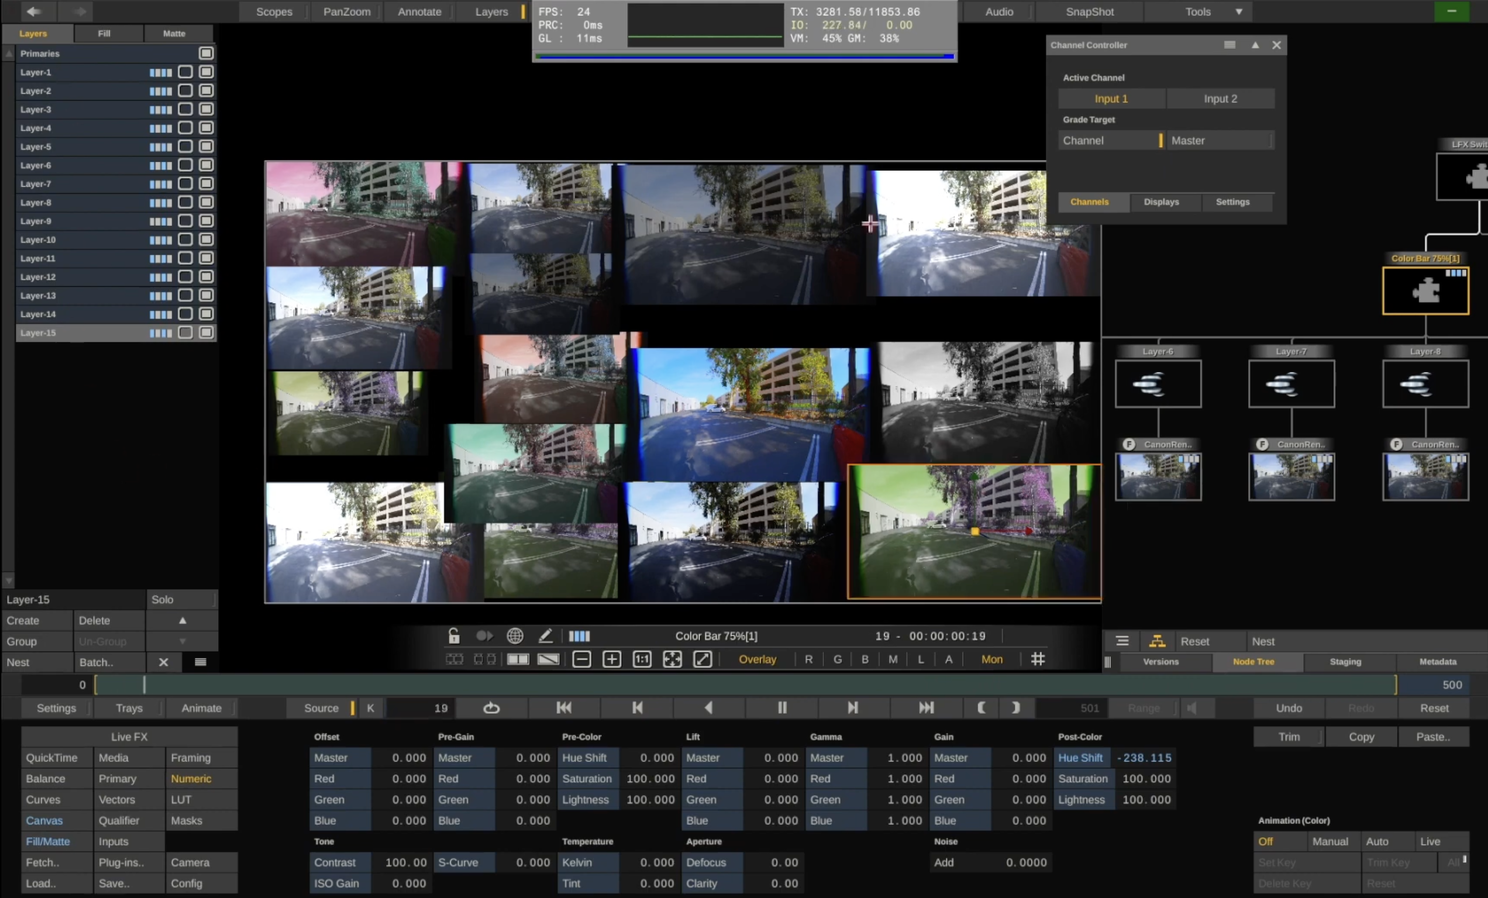
3) Color Management, Real-Time Color Correction of source content with Masks.
At the core of Live FX is the Scratch Playback and Color Engine, which has been used to Color Grade and finish thousands of Feature Films, TV shows and commercials. Why is this important? Because when shooting car process, you need to have a similar approach and grading process live at the stage.
The ability to live Color Grade at the stage is extremely important. For final color correction, Filmmakers would never ever just apply a LUT to the footage and call it good, and this approach should be taken seriously for Virtual Production work as well. Even if the camera is balanced to the wall, and even if the footage has been perfectly balanced by a professional colorist with a calibrated monitor (which never happens by the way), there are so many variables to how the color looks and how it should look, as well as any creative decisions that may be needed and you want every tool at your disposal. None of the live event media servers have serious, built in color tools, the third party plugins you can use are very limited, and at most can adjust primaries of the whole clip.
Futhermore, the other media servers only affect the output signal, so even if your clip has a lot of dynamic range, you are not able to access it directly. This is actually a very important point. The easiest way to test this is you should be able to bring in an HDRI, and bring the gain all the way down, if you can’t see the sun disk, it’s just effecting the output signal and you throw away all the range that an HDRI contains. Live FX of course has all the normal color correction tools you’d want, like Lift, Gamma, Gain, tint, kelvin, hue vs. saturation, hue vs. hue, highlight rolloff etc.
But more importantly, you can make feathered masks and adjust just specific sections. You can track footage, pull keys or use qualifiers. If you are shooting multiple cameras, you can grade the sections they are shooting separately. All of this is crucial when shooting car process.
4) Live FX is already the industry standard for everything Image-Based Lighting.
There’s a reason all the major lighting manufactures have adopted Live FX as their go-to tool for pixel mapping and image-based lighting. It’s very simple to pixel map lighting fixtures and to give a lighting console control over the lights in Live FX and it maintains color accuracy throughout. This means you can use the content to help light your scene, especially important for mimicking driving sections, such as dappled light through a forest. Live FX is also the only software with a defined workflow to properly map and control LED tiles as lighting sources, such as the KinoFlo Mimik. Other media servers require you to use the led processor to map the Mimik, Live FX allows you to map and color the Mimik separately from the led processor.
I was the VP Supervisor for a Linkin Park’s “Up From the Bottom” that the band considers one of their best music videos. On top of my VP Supervisor duties, I worked with the DP and gaffer to program all of the lights into Live FX. According to the DP, the dynamic lighting was the thing that he was most impressed by.
You can also make a mask for the content itself and use the content as the light card, brightening/grading part of the content specifically for lighting purposes, which is what I prefer to do usually.
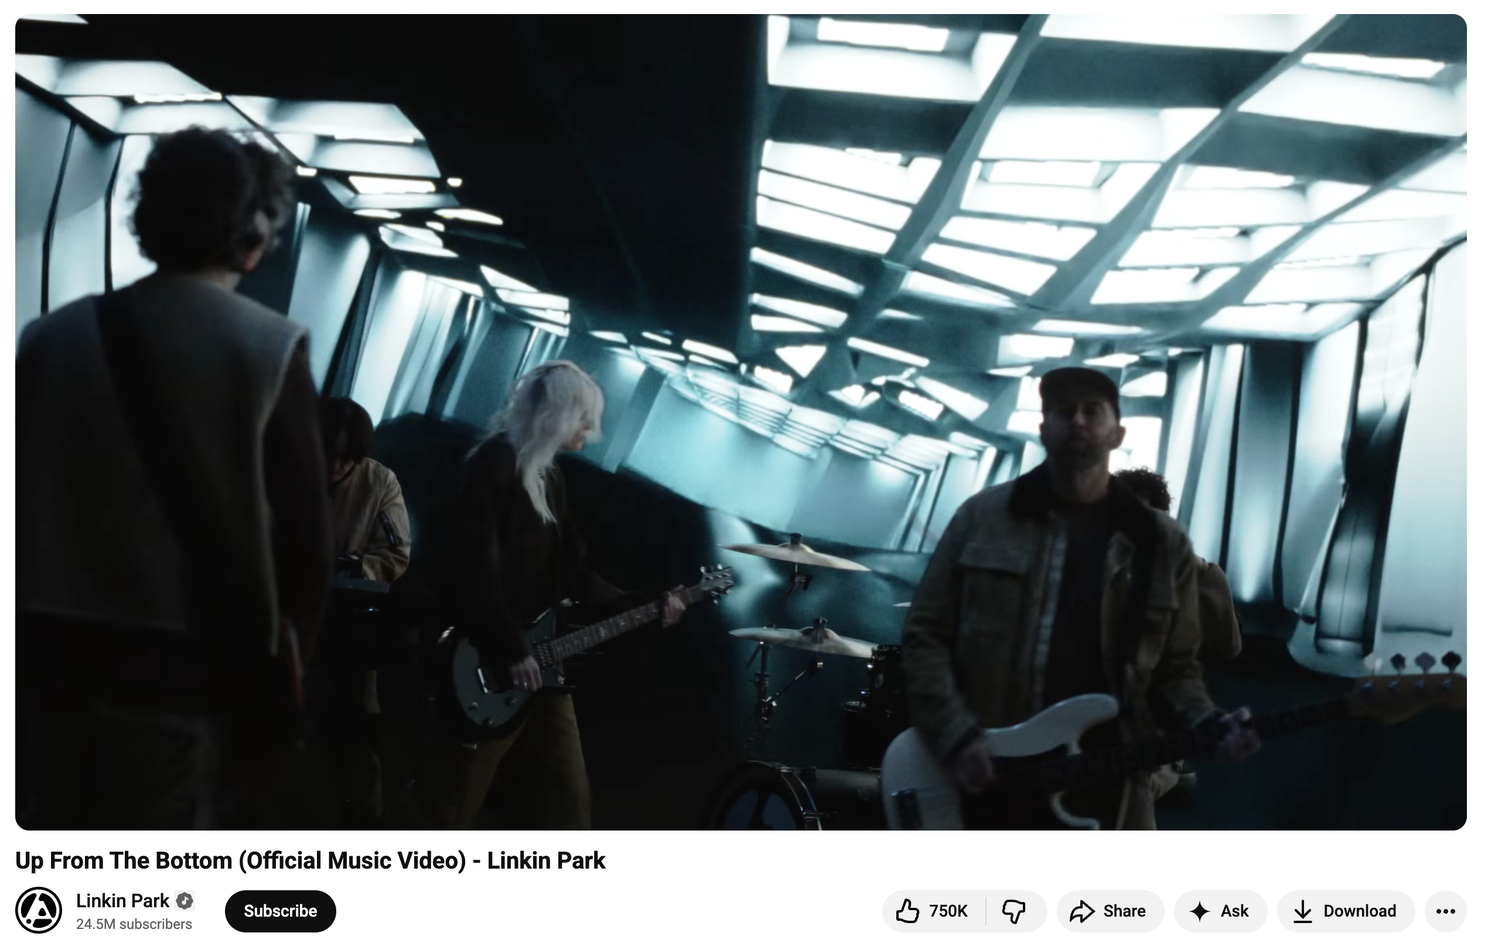
Lincoln Park used Image-Based Lighting in their latest music video. The wall was driven by Live FX and 100% of the lights and lighting effects were driven by Live FX.
5) Faster HDR Workflow.
I was recently at a stage that took 30 minutes to switch over their media server from SDR to HDR, and this is not a limitation of the stage or media server, but actually the way that Windows/Nvidia handles HDR, if going out DisplayPort. Since we can drive the wall with SDI, Live FX handles all Color Transforms and HDR inside the software and only takes a minute to get set up properly.
6) Live Grid Warp.
Oftentimes the plates that you have to use don’t quite fit the angle you’re trying to shoot, even if properly projection mapped. You can live grid warp this footage to look correct. Another use case is if your clip is not very wide, you can use the grid warp to extend the video to fill the volume, instead of just having black or something else that doesn’t match the content. For the ceiling, I often use this feature to make the reflections feel correct, as they often need to be exaggerated to work properly, based on where the ceiling is and the shape of the windshield.
7) Live Clone Stamp.
You can clone stamp any section of your video plates in real-time which have some simple and advanced use cases. You can do this with 12k footage, at the stage in real-time and you do not have to re-render! On a job recently, set in the past, i quickly painted out a few modern American flags which wouldn’t have existed in the time period they were shooting. This saved production at least 30 minutes and likely more if they had to send it to an off-site post team.
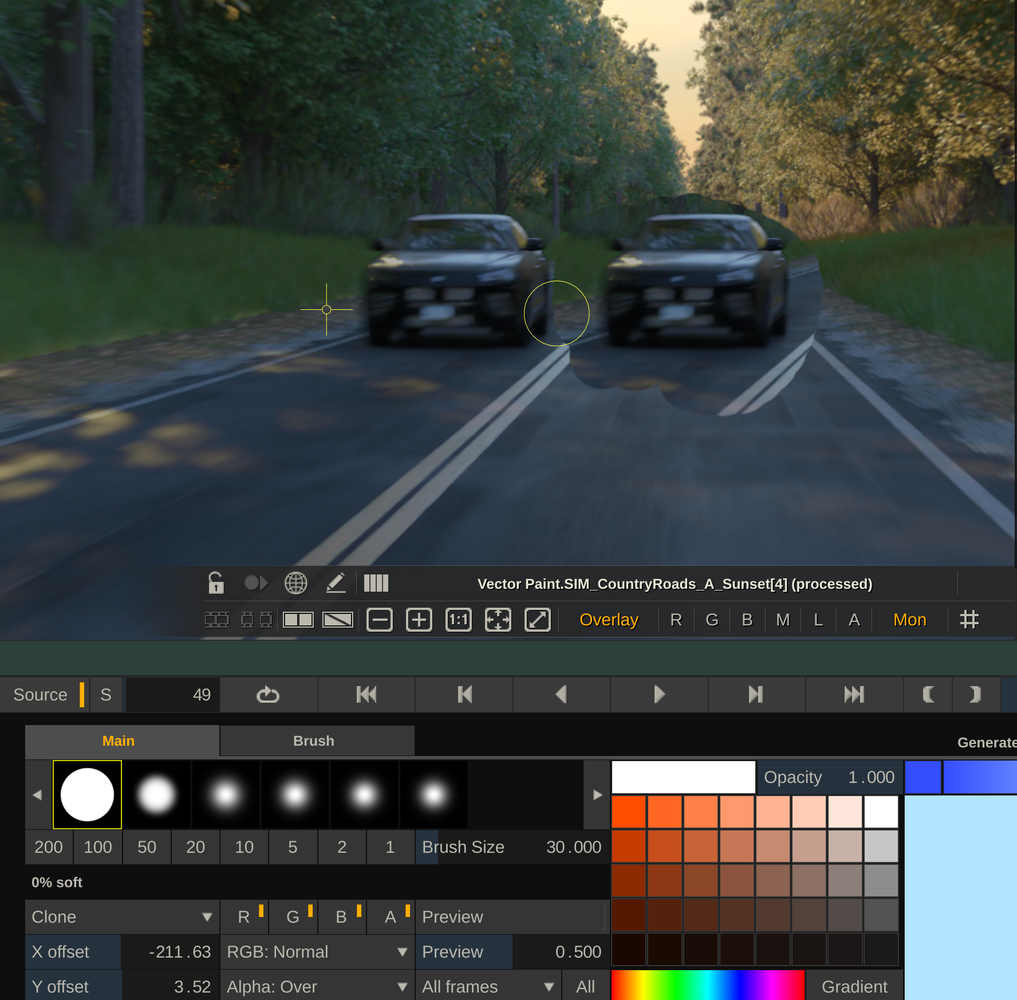
Live Clone stamping is such a powerful feature.
8) Very Stable.
Of all the software I’ve ever used, nothing has been as reliable as Assimilate’s software. The coding under Live FX is extremely efficient. I don’t even hesitate to update to the latest beta or even alpha versions even before a production; it's that stable.
9) True Live Compositing.
You can playback multiple angles of 2d content on top of a 12k360 video, but you can also do many advanced compositing techniques, such as using the Z-Depth pass to affect the depth of field or use lighting passes to re-light scenes live.
Lumostage in Vancouver uses advanced Live-Compositing Techniques with Live FX.
10) Fastest Start up by far.
With the program completely closed, it takes less than 1 second to open the program again! I don’t think there is a single application that opens faster on Mac or PC, seriously. In less than 10 seconds I can open the program, open an existing project and start projection mapping, with tracking and we can roll camera. Live FX is very stable, but in the case of a crash, the fact that you can be back up and running in 10 seconds is an amazing feature.
11) Ingest any media type including camera raw.
Literally any format the client hands me, I can either projection map directly, or transcode to any format I want to playback, this saves so much time. With camera Raw files, you have access to the full SDK and can manipulate the raw settings. Since it’s GPU accelerated, you can even use Arri, Red or Sony Raw for playback! On a global commercial recently, the client shot and delivered their own plates in Arri Raw, 6k, and we used the 6k Arri Raw as the playback format! This saved their team and the stage of days of transcodes/uploads/download/QC and we had the full dynamic range of the plates to use. Here are most of the formats it supports: Video Formats: NotchLC, HAP (all flavors including HAP HDR), ProRes, Cineform, Quicktime (.mov), MP4, h264/h265, DNX/XDCAM (.mxf), FFMPEG Raw Video Formats: RED Raw (.r3d), ARRI Raw (.ari, .mxf, .arx), Sony Raw (.mxf), Blackmagic Raw (.braw), Canon Raw(.rmf, .crm), Codex Raw, Panasonic V-RAW (.vrw), Nikon N-Raw (.nev), Phantom Raw (.cine), Kinefinty Raw (.krw, .dng) Image Sequence Formats: EXR (all compressions), DPX/Cineon (.dpx, .cin), Tiff, Jpeg, Jpeg 2000, Png, Targa, Bitmap (.bmp), Silicon Graphics (.sgi, .rgb), Photo Camera Raw (and you can adjust raw settings), Cinema DNG, Radience HDR (.hdr) Other Formats: Notch Block (.dfxdll), Cubric (.2p5d, .json), USD (.usda, .usdz, .usdc)
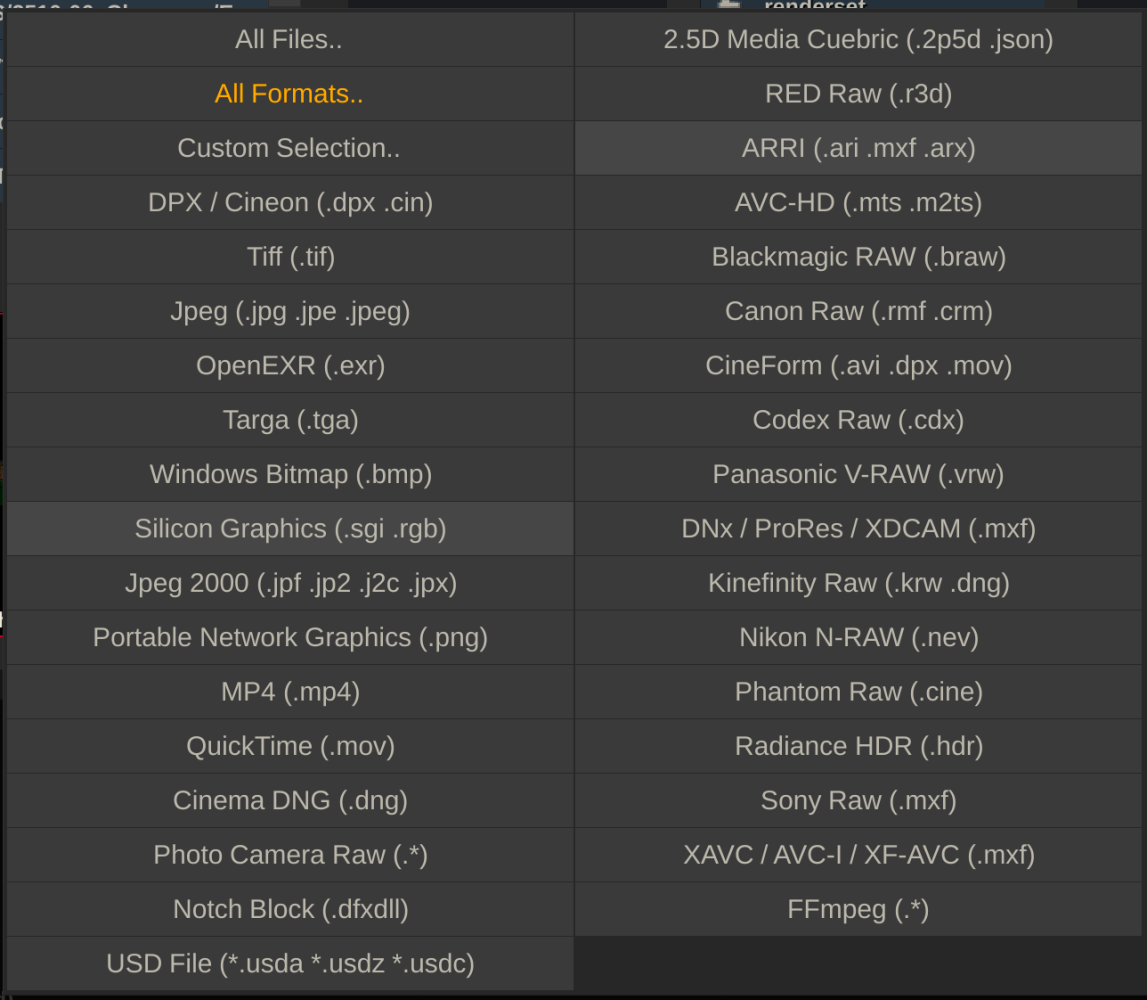
A very long list of the supported formats
12) Blazing fast transcoding to Notch LC and HAP
NotchLC is the standard for Video playback across all the media servers, and Live FX is 5 to 20 times faster than encoding with Adobe’s Media encoder on Mac. This saves hours of transcoding each time you need to use it. This reason alone should make any serious stage purchase a license, even if they use another media server! My first test was a 12288 x 6144 ProRes 422 file.
Here are the results: Media encoder = 25 minutes, 3 seconds Assimilate = 5 minutes, 1 second My next test was 8 Arri Raw files, transcoded to 8 separate files. Media Encoder kept failing and eventually, through a bit of trial and error, I realized Media Encoder couldn't use the GPU-Acceleration with the Arri Raw files for some reason. Media Encoder = 7 minutes, 15 seconds with LUT burned in Assimilate = 38 Seconds, with OCIO config applied! So 11.45x faster. Here is more info on my tests: The undisputed champion of Notch LC Encoding is...Assimilate!
13) Ultra high resolution.
I have successfully transcoded a 24k exr sequence to a tiled Notch LC output and played back 24k on a single machine!
14) Very fast to set up.
Because the video and genlock can happen through Video IO, we can bypass all the complicated Windows/Nvidia setups that can take hours to troubleshoot and sync. I once rolled into a 4x LED processor stage with my Live FX server all set up on my cart, I handed them my SDI cables, and after 10 minutes of mapping, we were ready to shoot! Need to change frame rate and sync? No problem, it takes just a minute.
15) Mac or PC.
Live FX works on Mac and has just been rewritten for Apple Silicon. Mac has a few advantages over PCs, specifically how it handles ProRes files (which do work on PCs with Live FX). It’s also very portable, I can bring my MacBook Pro and an external PCIe box in a backpack and fly anywhere and can handle at least 3x 4k LED Processors (probably more, just haven’t tested that on Mac quite yet). We ran 3x LED processors at an LED stage + image-based lighting, on my MacBook Pro, for this Creamsource Tutorial: https://www.youtube.com/watch?v=cENxxkLsZE0. On Mac you can use high resolution ProRes files for playback, you can see here I can playback 12k ProRes 444XQ at 44fps (so 24fps playback would be stable).
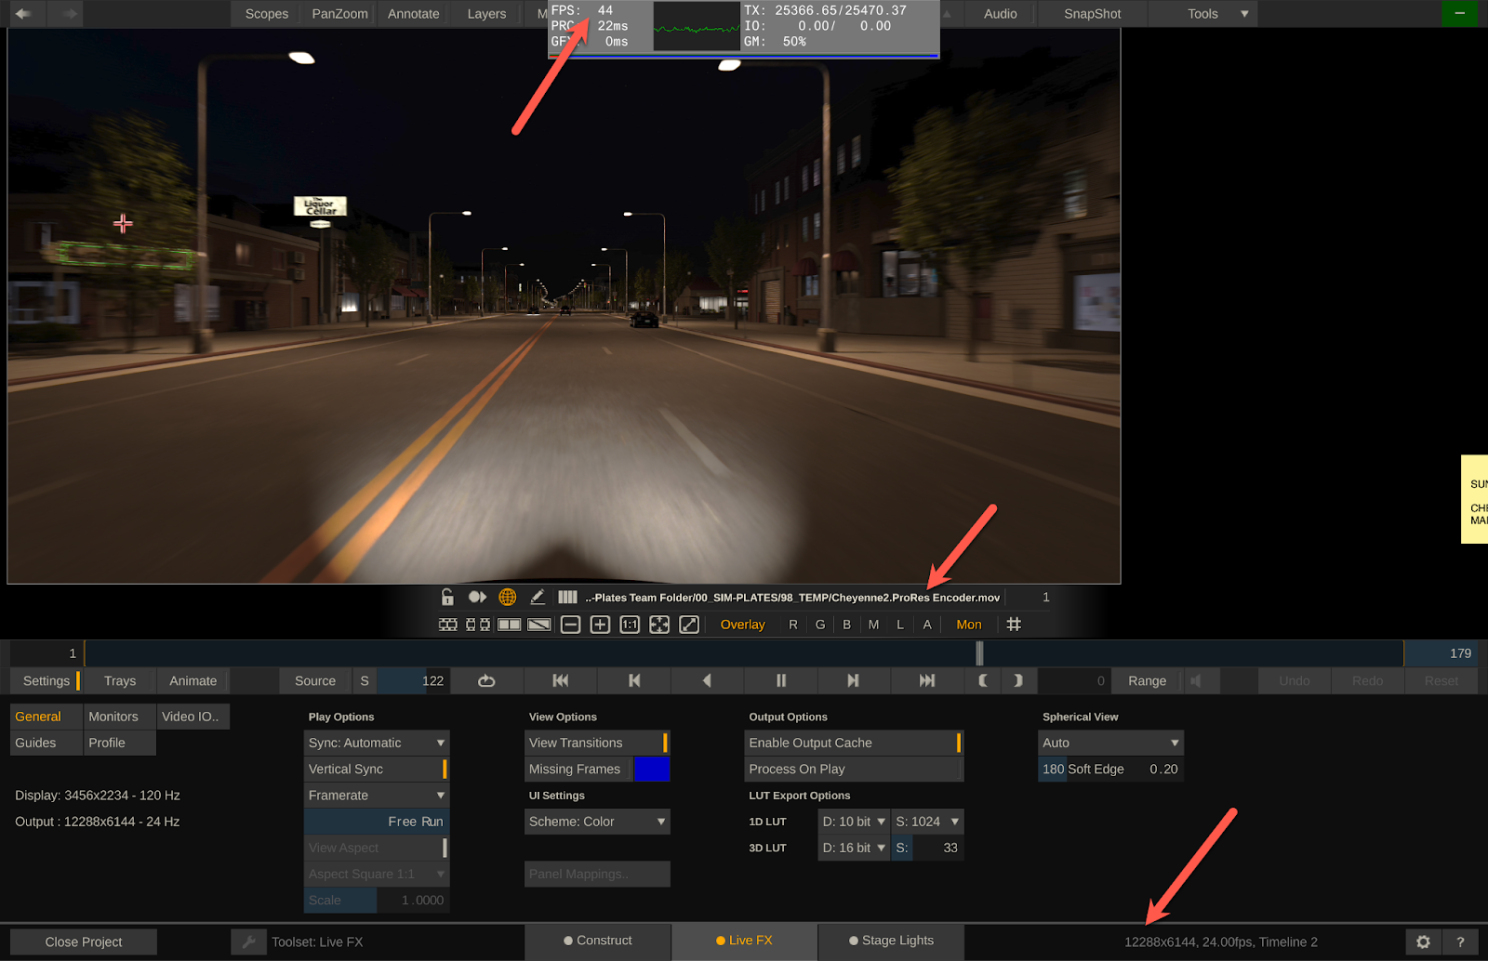
ProRes 444XQ playing back at 44fps
16) Correct and fast way to projection map 360 Video and 2.5d Video
To do 2.5d projection mapping in other software, it takes quite a bit of manual setup, and several minutes (or more) for every single shot. For 10 clips this might take over 20 minutes, just to get setup for playback. Live FX takes just seconds to projection map 360 video, even for an entire timeline of footage. 4 clicks total to get there, with tracking and everything.
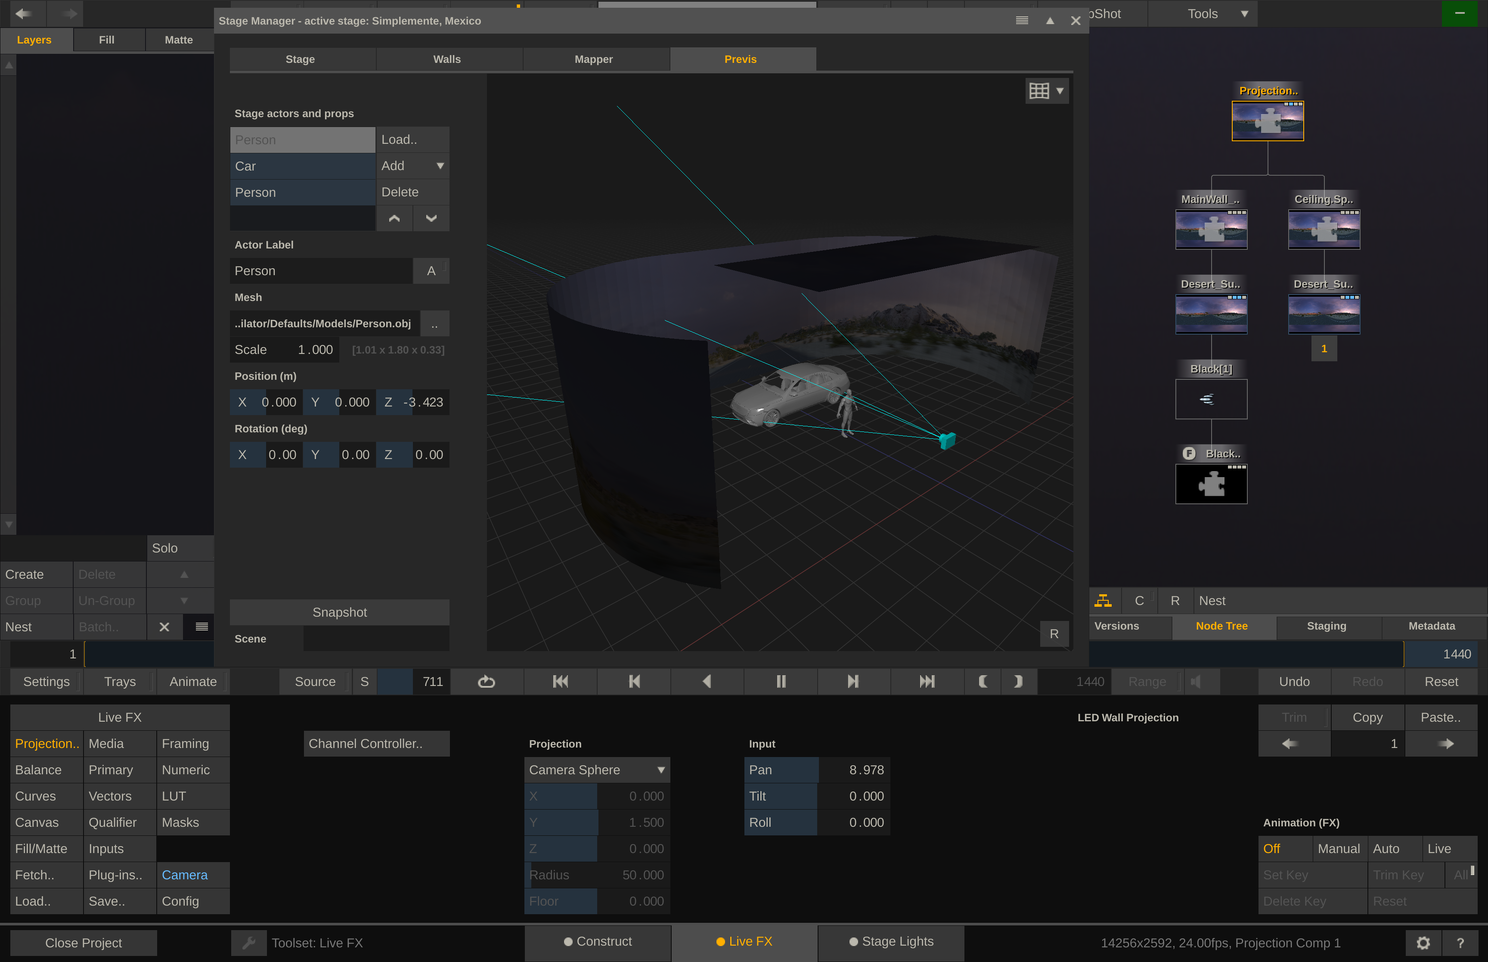
Projection Mapping with 360 Video is very simple to setup.
17) Easy and fast version control.
You can very quickly add a new version and keep all of your settings saved, and recall that version easily at any time. This may seem like a small thing, but every shoot I’ve ever done, this has come in very handy, and this feature doesn’t exist in any meaningful way in the other media servers.
There are a hundred examples I could give, but one very obvious one is when you have to shoot one setup, move onto a different setup, and then you need to come back to that previous setup. If you don’t have a way to recall these settings, continuity will be off. Another example is the DP wants to try a few different looks, and be able to A/B them back and forth.
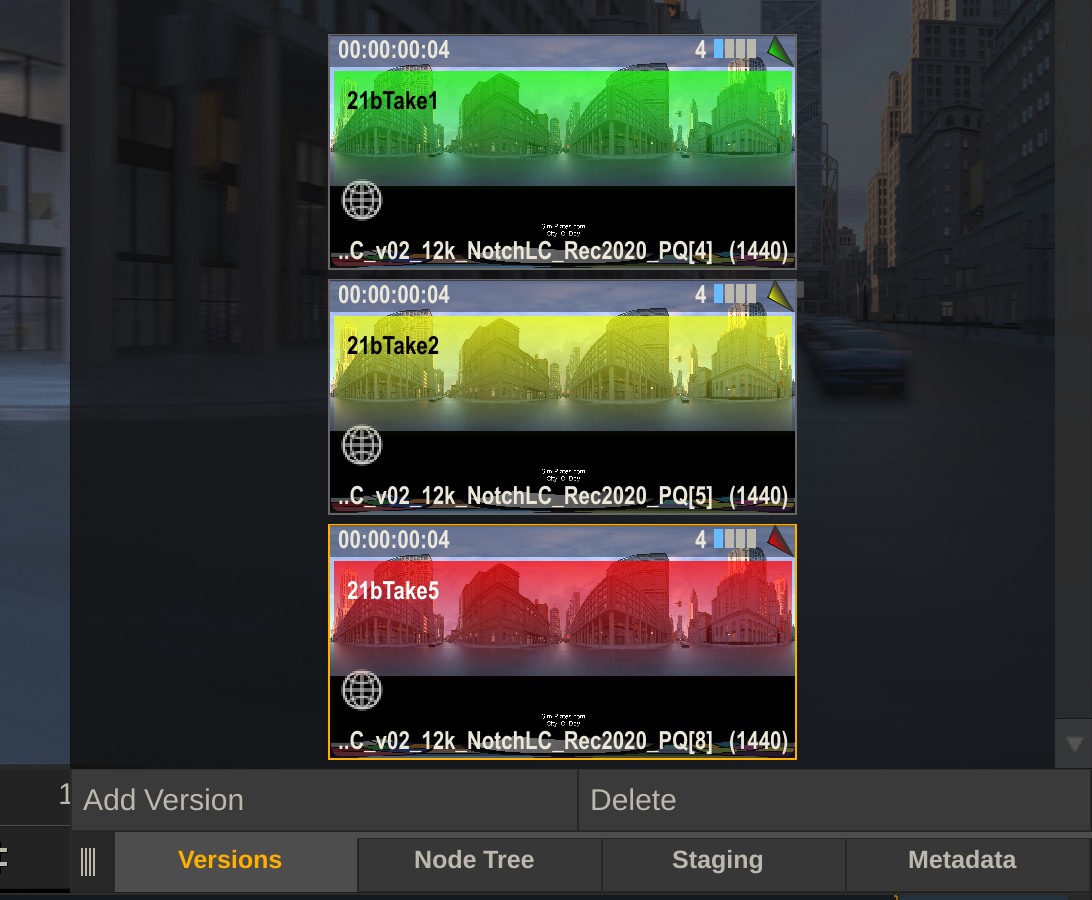
Fast and easy version control. Like level snapshots buy easier.
18) Keep your existing hardware and nDisplay setup.
Because Assimilate isn’t hardware dependent, you can use your existing computer(s). And since you can use the SDI input on the LED processor, you don’t have to change your existing nDisplay Unreal setup on the HDMI input. Usually stages just select one of their UE render nodes, insert a video IO card and they are good to go. Because the Color/HDR settings all happen inside Live FX, you don’t even need to change anything through Windows settings (if using the SDI workflow).
19) Instance Video
One of the things that makes Live FX so versatile, is that it can “instance” video, in other words, you can have the same video on your canvas 20 times, and completely change all of them, color grade them separately, scale them, add grain, whatever you want to do, and it only reads and writes that video 1 time. So even with 12k 360 video, you can have multiple versions up at the same time with almost no performance hit.
15 different versions of the same video, still playing back in real-time.
20) Stitch videos into one 360 Video
Live FX has a way of importing PTGui files, and has a workflow to stitch footage together. Not only this, but you can manually feather/grid warp in real-time which I have had to do to stitch plates that were deemed “unstitchable” by the client. PTGui/Live FX is not the best tool for stitching all-in-one 360 cameras, Mistika has earned that title, however, when it comes to stitching custom rigs like those from plate companies, Live FX has some major advantages over Mistika. The main reason to use Mistika is for their excellent Optical Flow, but this only works if the cameras are very close together, really only 360 cameras. In the case of any custom camera rig, the Optical Flow artifacts are usually worse than just a simple feather, so you switch to feather in Mistika. So in these cases, you can get similar results in Live FX as you can with Mistika, but you can work much faster and when you are ready to export, you can export straight to NotchLC if you need to.
21) Neat Video for Denoising.
Neat Video has an OFX plug-in that works directly in Assimilate, and being able to denoise without leaving the software, and more importantly export directly to Notch has a massive speed advantage to any other workflow. And once again, using Neat Video in Assimilate is also much faster than any other software that uses Neat Video.
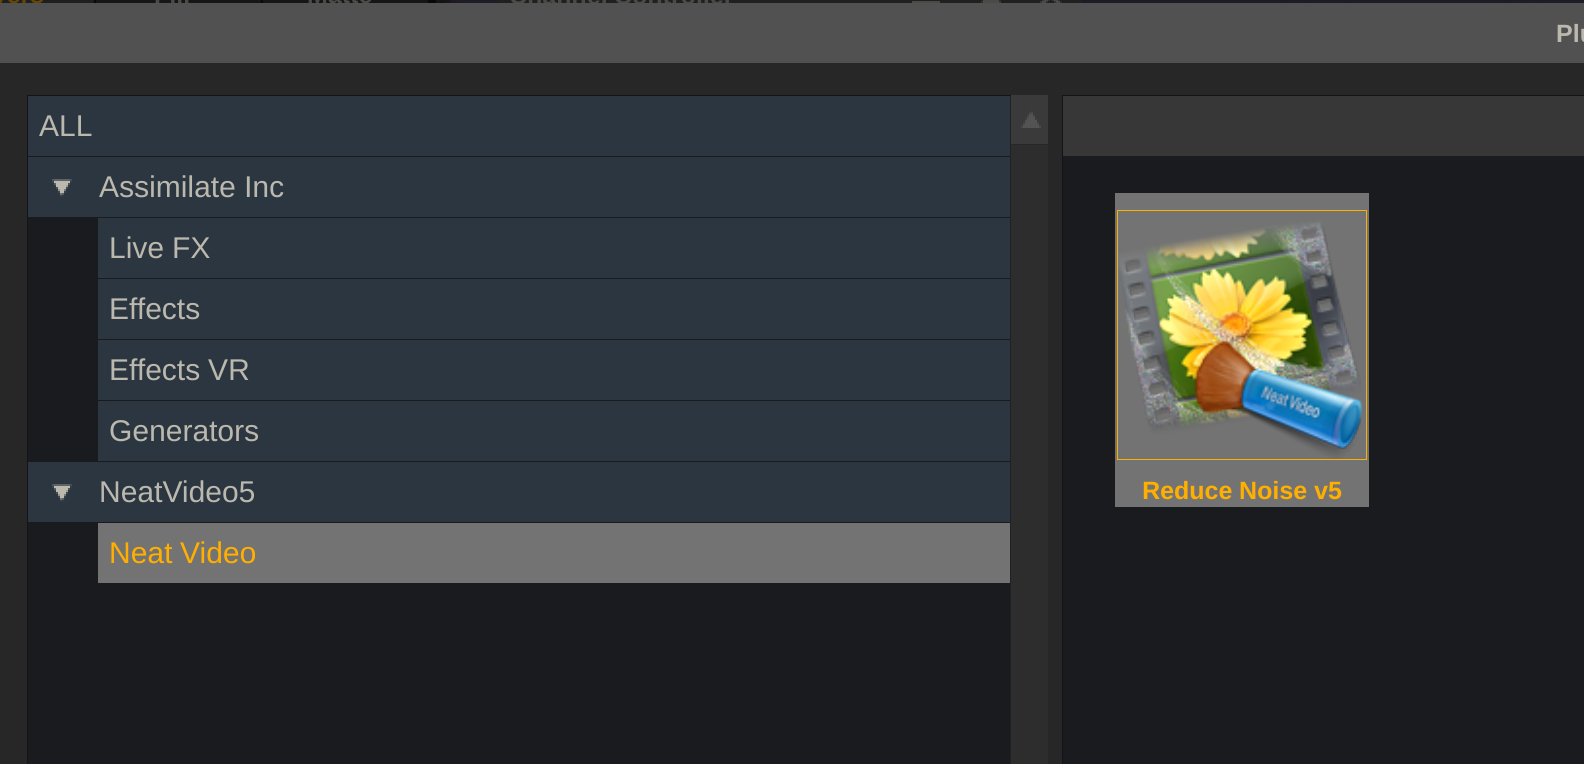
Neat Video is still the king of denoising, the fact you can use it directly in Live FX is very helpful. I can go from my EXR source, de-noise and transcode immediately to NotchLC
22) SynthEyes support for stabilization.
You can use SynthEyes to stabilize a 360 video car process shot, and import the keyframes directly into Live FX without the need to re-transcode. This can save hours per shot!
23) Scopes
This may seem like a small one, but Scopes can be extremely helpful, especially when prepping HDR footage. If your wall is at 1500 nits, how else can you master the content to match?
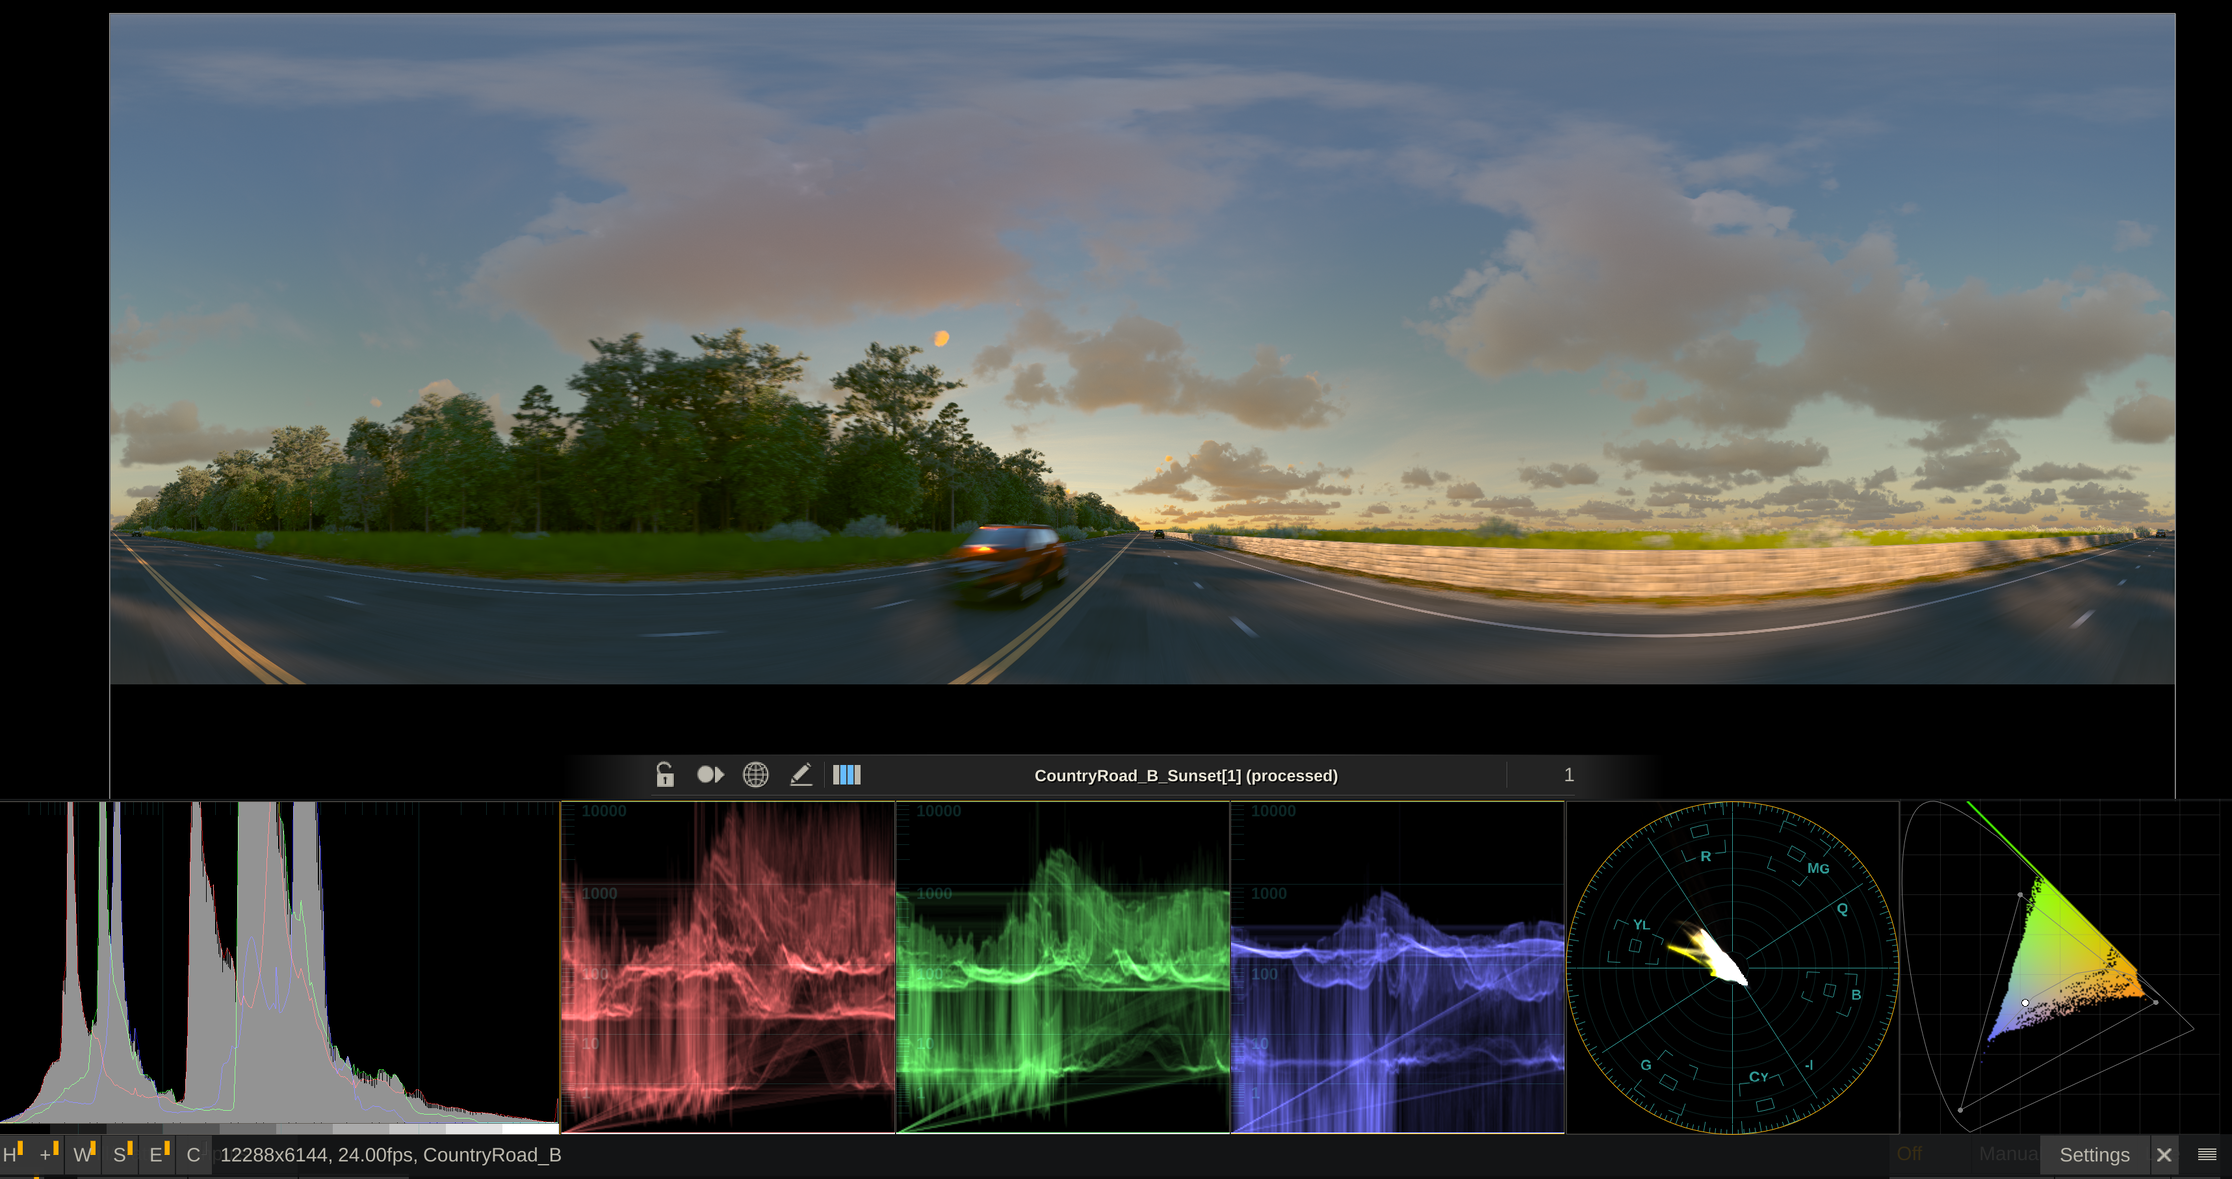
Histogram, Waveforms, Vectorscopes and CIE Plots are all very helpful tool for Virtual Production and can help troubleshoot content issues.
24) Match-box Shaders
Live FX supports real-time GSL shaders (Match-Box), a library of effects for compositing and IBL lighting; Fire, Snow, Rain, etc which are great for car process.
25) Fast High Resolution Offline Compositing
I’ve already covered Live Compositing, but this deserves it’s own reason because Live FX is the fastest offline compositor I’ve found to comp our 12k+ exr sequences for Sim-Plates. In a normal plate, about 5 different, 12k exr sequences. Even with these composited together and with color/blur effects on each layer, I can still playback and export in full resolution/quality at around 4fps, which may sound slow if you’re not used to offline compositing and exr sequences, but if we compare the same setup in Fusion Standalone, this is about 1 frame every 25 seconds.
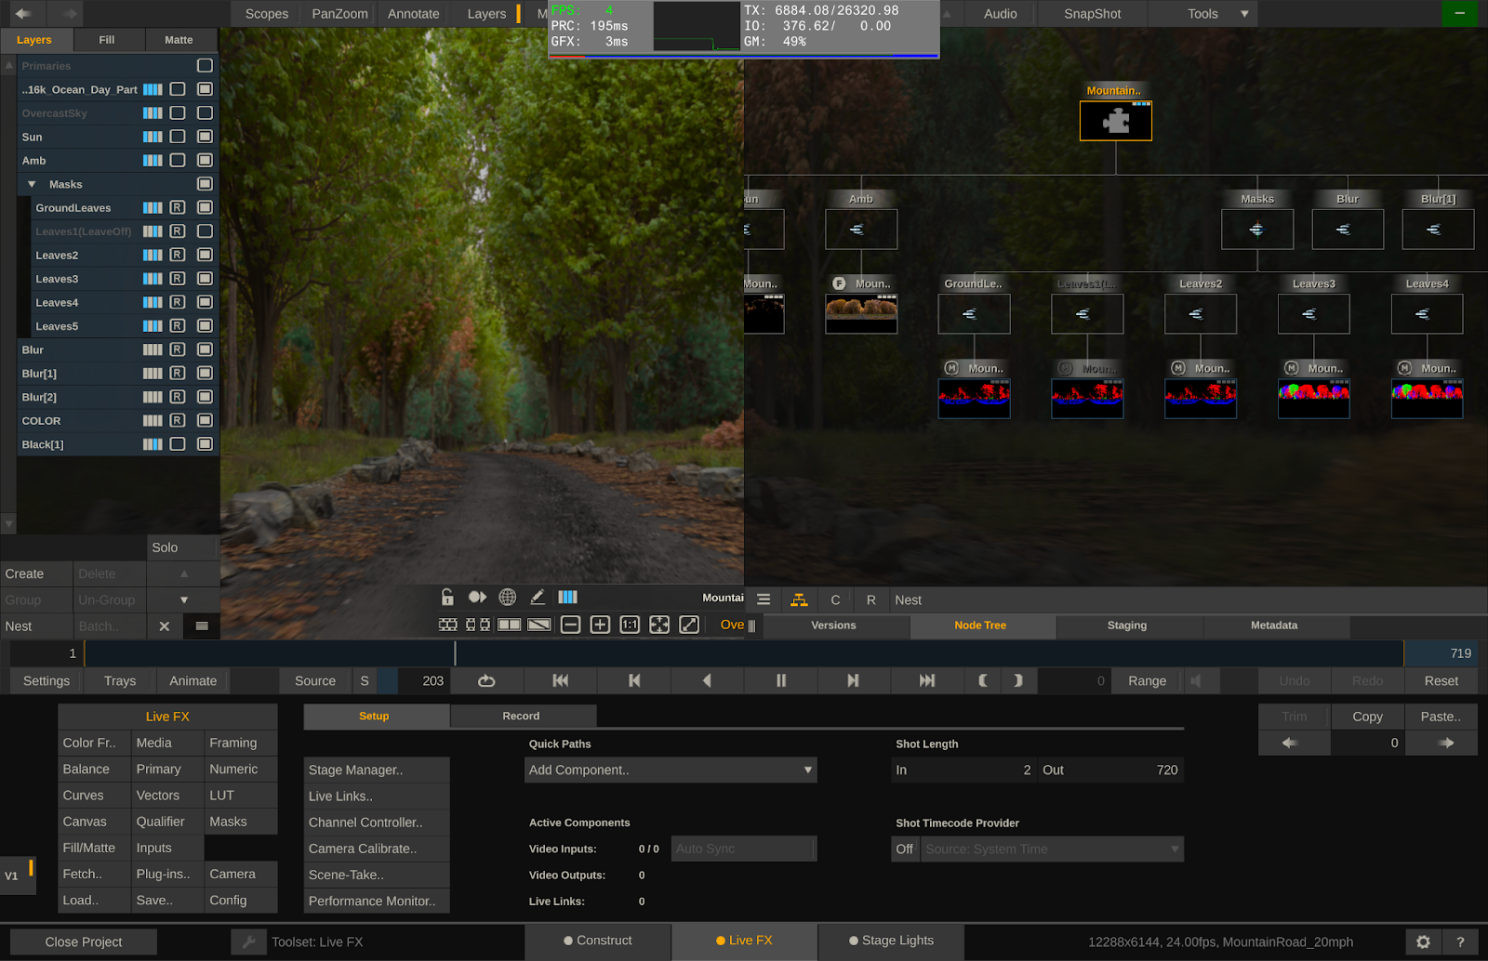
Even with 5x EXR sequences and many color fx, I can still playback and render at 4fps.
After caching, Fusion might be faster than Assimilate, but it freezes/crashes often and can freeze up my entire system, and this is with a brand new, top of the line Mac Book Pro, which has 128gb of Memory! Of course I could do a proxy workflow, but when dealing with high-res footage, it’s crucial to me to make decisions based on the actual resolution media.
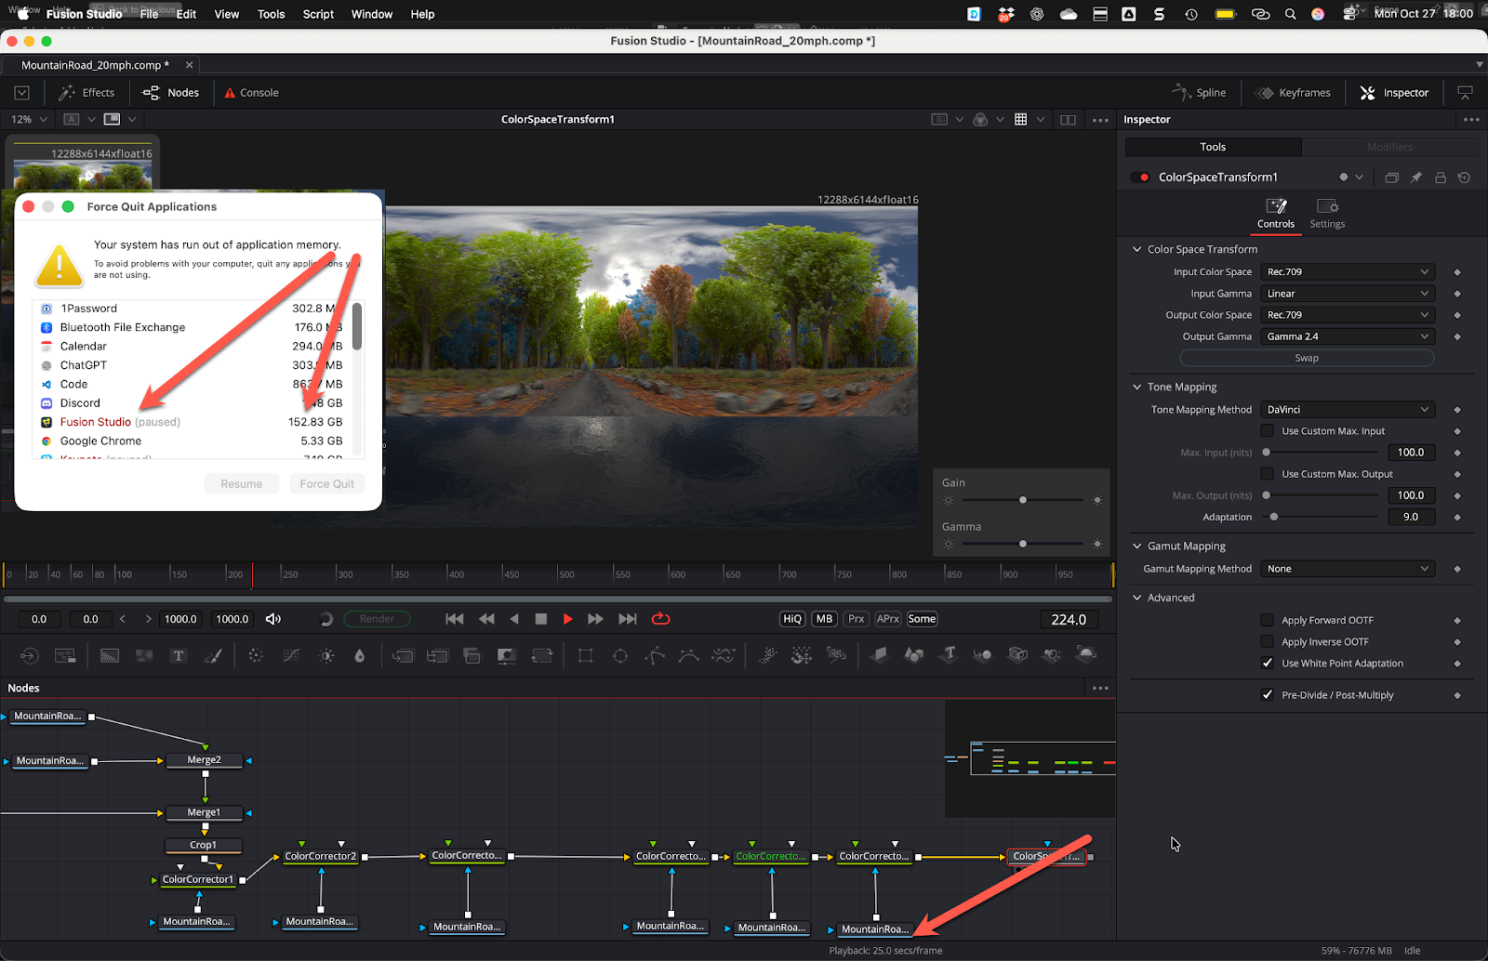
Fusion Standalone Freezing and taking all the memory on my computer